Machine &Module:NEJE 3 Max v2 & E80
Material & Tools:3mm plywood, ink paint, roller
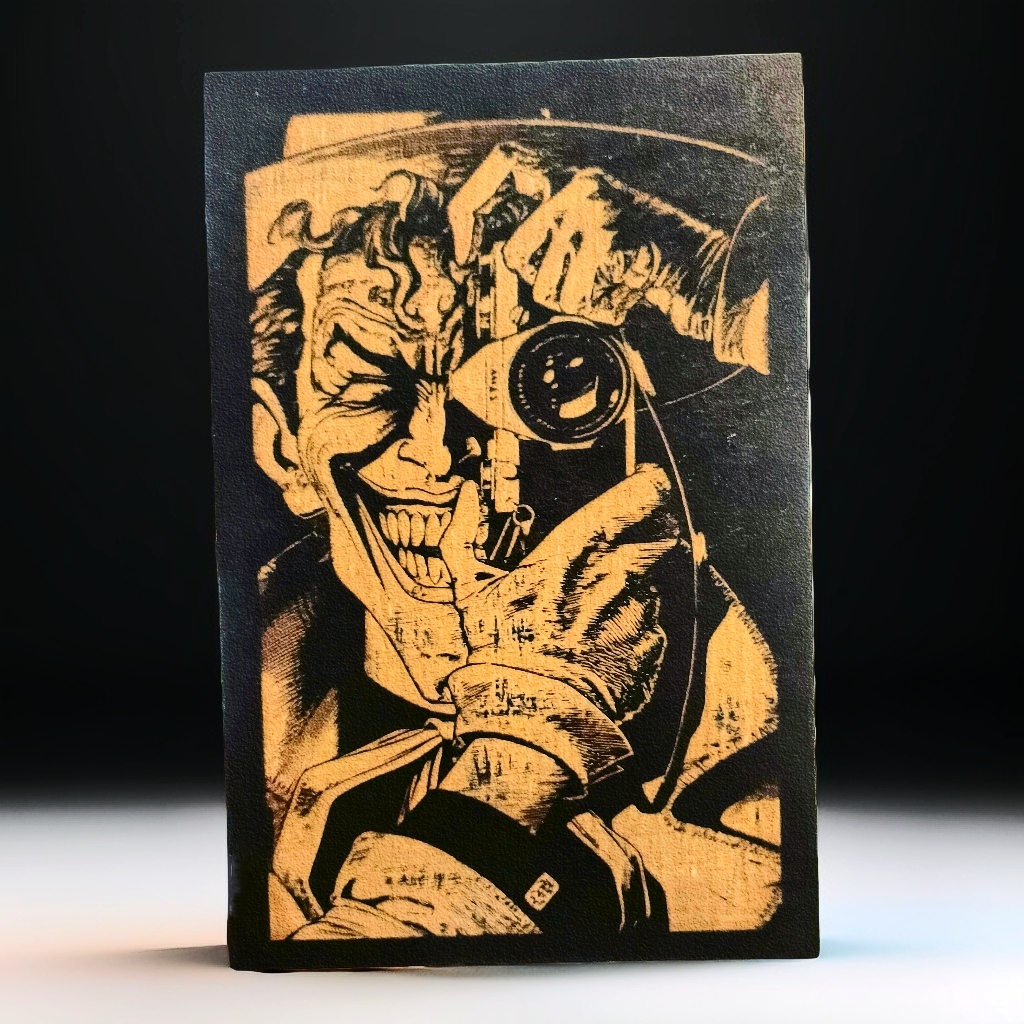
The Idea You Get From This Post:
1.Pre-focus
Place the plywood and measure the focal length between the plywood and the E80 module to be 25mm.
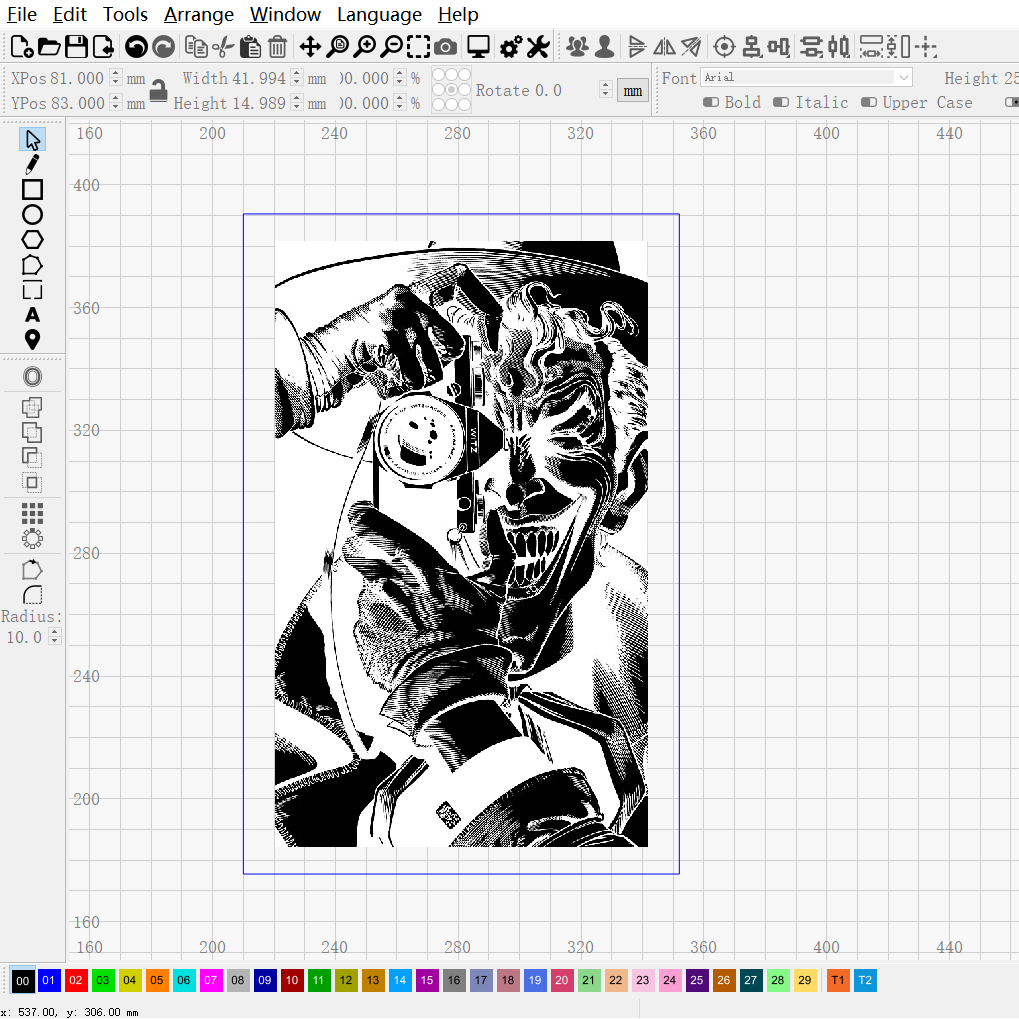
2.Upload the file
Connect the machine and open lightburn, upload the dxf file you downloaded to the lightburn application interface.
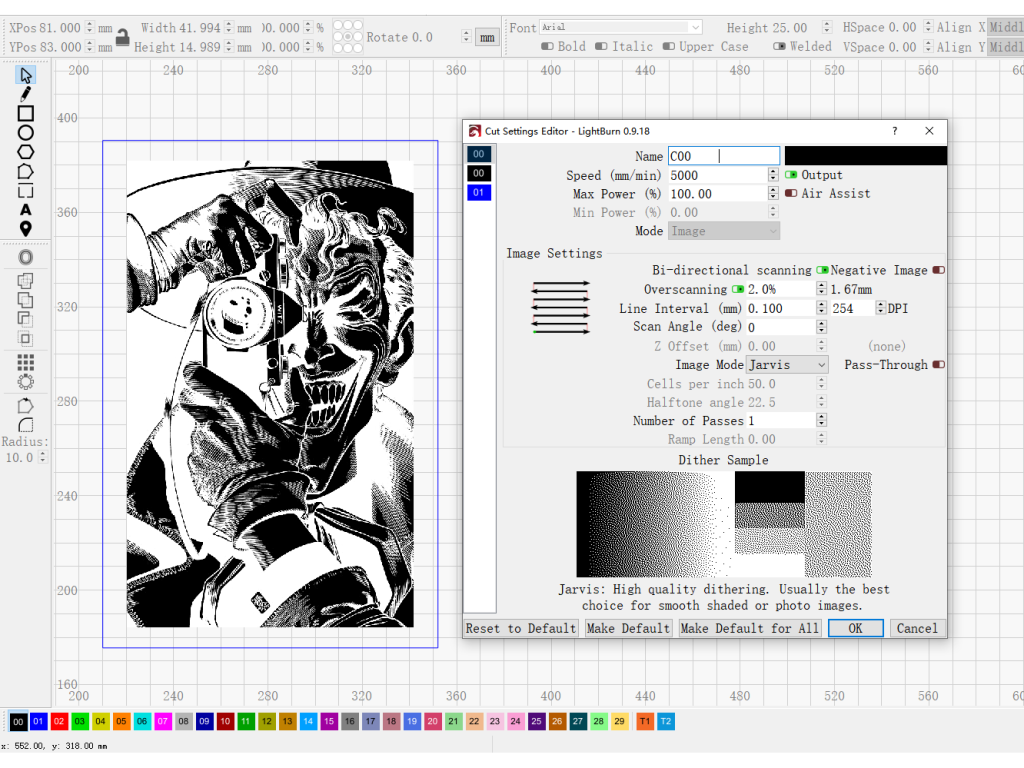
3.The Settings in Lightburn
5000mm/min, 100%power, 2% Overscanning, 254dpi,Jarvis
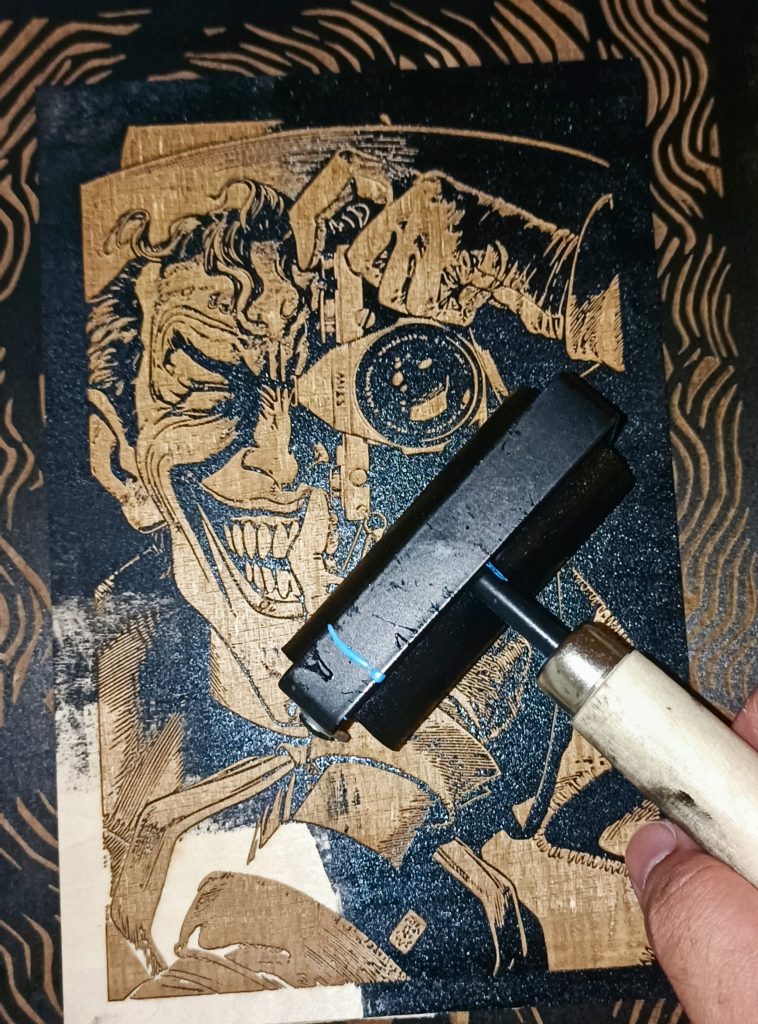
4. Other instructions
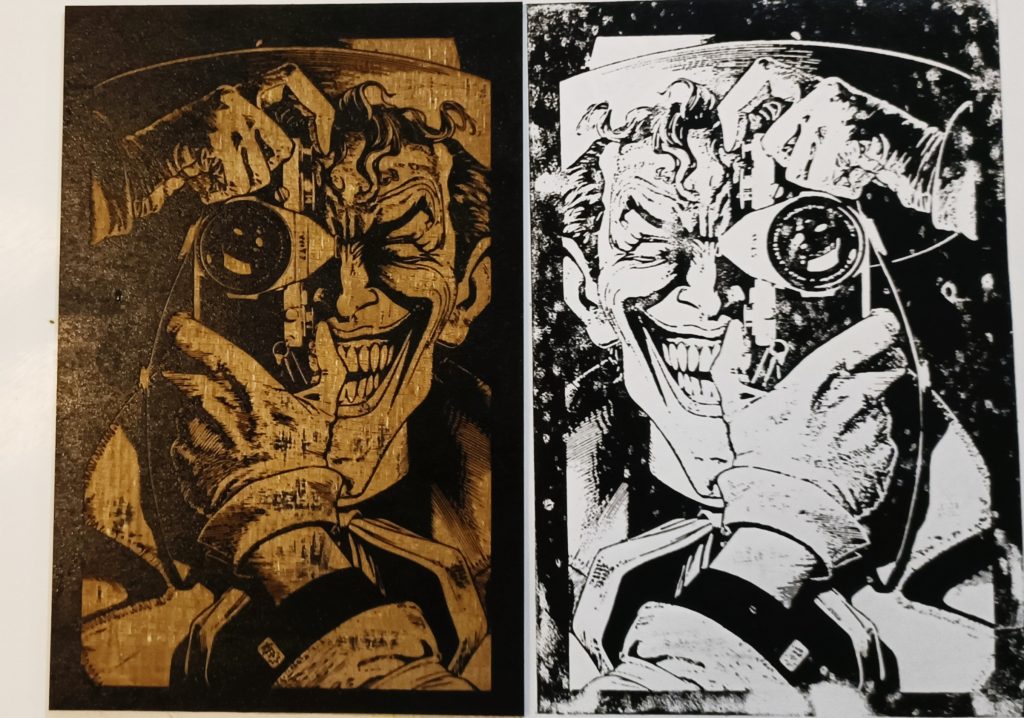
- After the engraving is complete, it can be painted over using ink paint and roller. (right)
- Once it’s evenly applied, you can print the image directly on anything you want. All in all, this is using a laser machine to make a large seal.(left)
5.Note
If your image is just simple black and white, you can trace your image to fill with the settings: 5000mm/min, 90%power. If your image is like this one from DC comic, it has some hard-to-trace lines and shading, please refer to step 4
- ALL-NEW Laser Rotary Attachment: Micron-level precision & One-handed operation
- Plywood Laser Cutting Tutorial: Step by Step – Snake Lantern
- NEJE laser engraver ideas——Zodiac Tailsman
- NEJE laser engraver ideas——Teapot storage
- NEJE laser engraver ideas——Mario refrigerator magnet
Ive read several just right stuff here Certainly price bookmarking for revisiting I wonder how a lot effort you place to create this kind of great informative website
There is definately a lot to find out about this subject. I like all the points you made